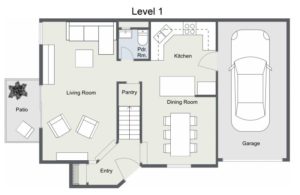
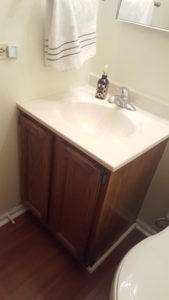
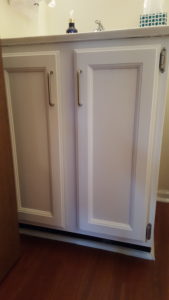
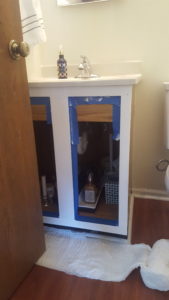
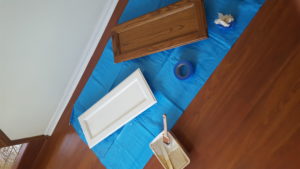
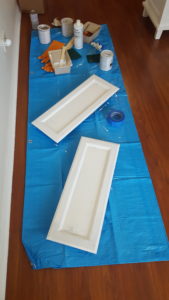
We knew one of the first big projects we wanted to do in our house was painting the kitchen white. Our kitchen is a tiny 11 x 10, the layout can be found in the layout below to give you a better idea. Dark cabinets made it feel even smaller so while white cabinets may not be on trend as much anymore I knew that I wanted them to help brighten and make the space feel larger. I know this post is about painting a bathroom vanity but the kitchen is the reason we decided to paint the vanity first, since it had the same cabinets as the kitchen we knew it would be a good trial run of our DIY skills (or lack thereof).
Do I feel super nerdy for getting digital floor plans made up of our space? Yes. Would I do it again? Absolutely. So much entertainment moving around imaginary furniture around for that time between an accepted offer and officially closing.
Anyways, we bought the Rustoleum Cabinet Transformation Kit in Pure White probably within a week or two of closing in December but held off and waited for warmer weather so we could air out the paint smell without freezing. That went pretty smooth and painless and maybe gave us a false sense of security in how smooth the whole kitchen process would be? We started prepping on a Friday night and painted Saturday and were all finished up by Sunday afternoon. A perfect weekend project.
The before and after is all that matters but I’ll go into the process a little below. We also added hardware since both our kitchen and bathroom cabinets had none. This project can be done if you’re replacing hardware it just takes the extra step of removing old hardware, using wood filler to patch those holes and then drilling new ones.
So here’s a breakdown of what we did:
- Remove Everything
- Scrub/Clean Everything
- Deglosser (included in kit)
- Rinse deglosser off until no suds appear, then rinse some more
- Let dry for an hour (we let it dry overnight since it was late on Friday night)
- Bond Coat #1
- Dry 2 hours
- Bond Coat #2
- Dry 2 hours
- Bond Coat #3
- Dry 2 hours
- Protective Top Coat
- Dry overnight (12 hours)
- Drill holes for new hardware, install new hardware
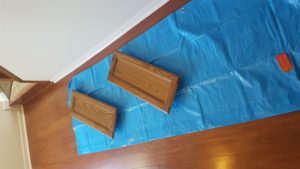
- Re-install cabinet doors
Prep is probably the most important and least fun part. The kit doesn’t requiring any sanding but instead uses an included deglosser that takes off the shiny finish on the cabinets. Before using that though the cabinet needs to be thoroughly cleaned. Then the deglosser is used which is almost like a soap because when you scrub it it starts to foam a bit. Next you need to rinse off any residual deglosser and let everything air dry before doing any paint.
There is no primer, just the bond coat which goes on very nicely. This was the most fun part because you can actually start to see a difference, the prep work is tedious with no reward whereas the painting goes by quick (minus dry times) with a huge visual payoff.
I will say the kit recommends two coats but we did three. When the bond coat first goes on it looks beautiful but then after it starts to dry the wood almost sucks up all that paint and you’re left with a off white/streaky wood grain showing mess. We didn’t paint the inside part of the cabinet doors – 1 because we didn’t mind the interior not being white and 2- it drastically cuts down the project time since you would have to wait for all the dry times and flip and repeat for the other side. We figured we could afford to put another coat on the fronts of the cabinets since we weren’t painting those interiors. The kit also includes a decorative glaze, after some research on the kit and white cabinets we decided against using the decorative glaze since we didn’t like the results we saw on other reviews. If we were going with dark cabinets we probably would’ve used the glaze though since it brings out the wood grain look more (although it really isn’t bringing out the real grain it’s just highlighting paint brush strokes to make it look like wood grain).
We left them with the top coat to dry overnight and spray-painted the hinges we had with a metallic silver color so we wouldn’t have to get new ones. Sunday we installed the new cabinet pulls and put them back on with our old (but new looking) hinges and were done!
Overall the kit was $80, the metallic spray paints was $7, the cabinet pulls were $6, and the 2″ wooster shortcut paint brush used was $5. Of course in a few trips to home depot far more than $98 was spent but the kit did include everything else we actually needed for this project minus painters tape which we already had on hand. Keep in mind we used this same kit to paint our kitchen since this small vanity barely made a dent in the small space kit.
Up next the whole kitchen!

